How to address false positives
Introduction
In antivirus software, a false positive occurs when a file or process is incorrectly identified as malicious. A false negative occurs when a genuine threat is not detected. False positives and false negatives can occur with any antivirus solution, including Datto Antivirus (Datto AV).
This article explains how to identify the source of detections, review and remediate alerts, define exclusions, and submit files for analysis to reduce false detections and improve overall protection.
Identify the Detection Source
When investigating a suspected false positive, first determine the detection source.
| Detection source | Recommended action |
|---|---|
| DNS Secure: The alert is generated by the DNS Secure component of Datto Antivirus. | Submit the domain as a false positive to Datto Support. Workaround: Add the domain to the Trusted Domains list in your DNS Secure policy or exclude the executable process from DNS Secure scanning. |
| Antivirus: The alert is generated by the Datto Antivirus scanning engine. | Perform the steps below to address Datto AV alerts. |
Addressing Datto AV alerts
Step 1: Review AV alerts
Identifying and addressing true positives, false positives, and benign activity helps train your antivirus solution and can reduce false positives and false negatives over time.
Determine whether an alert is accurate
Before classifying or suppressing an alert, determine whether it represents a true threat, a false positive, or benign behavior.
- In the Datto EDR portal, click Alerts.
- Select an alert to view its details.
- Based on your findings, take the appropriate action described below.
| Alert status | Recommended action |
|---|---|
|
The alert is accurate. |
Investigate the alert further and follow standard incident response procedures. See Responding to alerts. |
| The alert is a false positive. |
|
Step 2: Review remediation actions
When Datto AV is configured to Protect & Quarantine, remediation actions such as quarantining files are applied automatically to detected threats. Other actions, such as antivirus scans, may be initiated manually or on a schedule defined in the Datto AV policy.
After reviewing alerts, review any remediation actions that were taken. If actions were triggered by a false positive, some remediation actions can be reversed.
You can:
- Restore a quarantined file on a single device.
- Restore quarantined files across multiple devices.
Restore a quarantined file on one device
- In the Datto EDR portal, select Alerts.
- Open a Datto AV alert.
- Click the Respond button, then choose Restore File.
- Click Confirm to start the response action. Once restored, the file is excluded on that device using the path shown in the alert.
Restore quarantined files across multiple devices
- In the Datto EDR portal, select Respond > Quarantined Files.
- Use search or filters to locate the files.
- Select the files you want to restore.
- Click the Restore Files button.
- In the confirmation dialog box, click OK.
Once restored, the files are excluded on each device using the path shown in the alert.
Step 3: Review or define exclusions
ALERT Before creating exclusions, review Working with exclusions in your Datto AV policy to ensure exclusions are properly formatted and scoped. Review exclusions regularly to confirm that only required items are excluded from antivirus scanning.
About exclusions
An exclusion is an entity, such as a file path, folder, process, or URL, that is excluded from antivirus scanning. Excluded entities are not scanned, and no remediation actions are taken against them.
- Excluded paths are exclusions that you define by their location (path). These types of exclusions are also known as file and folder exclusions. For more information on creating exclusions refer to Working with exclusions in your Datto AV policy.
- Excluded processes are exclusions for files that are opened by certain processes. These types of exclusions are also known as process exclusions.
For more information on creating exclusions, refer to Working with exclusions in your Datto AV policy .
Create an exclusion from an alert
- In the Datto EDR portal, select Alerts.
- Open an AV alert.
- Click the Create Exclusion button.
- Verify the Path and Exclusion Type.
- Select the policy the exclusion should apply to (Universal AV Exclusions or a specific assigned policy).
- Click Add.
Create an exclusion from the policy editor
- On the top navigation bar, click Policies.
- Your Policy List is displayed. For the applicable Datto Antivirus policy, click the ellipses menu.
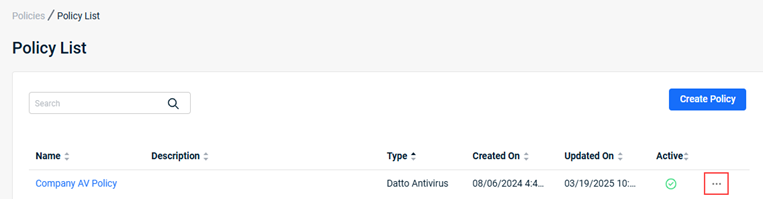
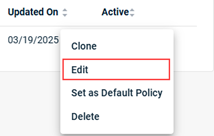
- Select Edit.
- Expand the Exclusions section.

- Click the Add Exclusion button.

- In the Add Exclusion modal:
- In the Path field, enter the exclusion.
- In the Type list, select File, Folder, Process, or Hash (Windows only).
- Click the Add button.
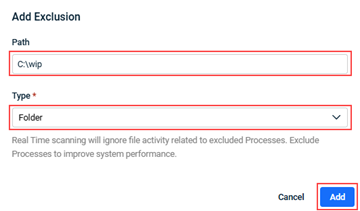
The exclusion is listed in the Exclusions table.
- To add another exclusion, repeat step 6.
- In the upper-right corner of the Edit Policy page, click Save.
NOTE Click the Export Exclusions icon to export the list as a CSV file.
Create and Implement a Universal AV Exclusion
- On the top navigation bar, click Policies.
- In the left navigation menu, select Universal AV Exclusion.
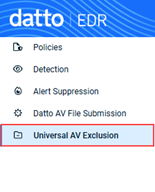
- To create a list of exclusions using the Create Exclusion button:
- Click the Create Exclusion button.
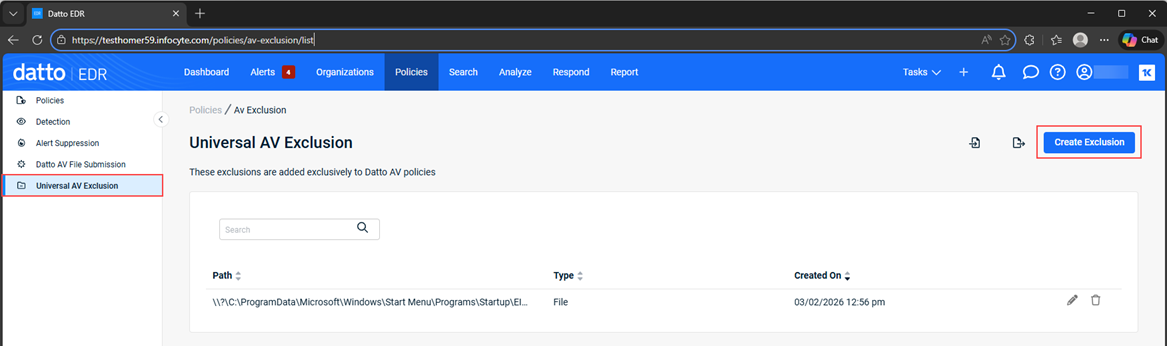
- The Create Exclusion modal is displayed. In the Path field, enter the exclusion.
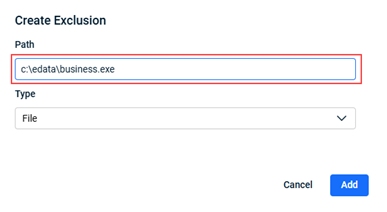
- In the Type list, select Folder, File (selected automatically), or Process or Hash (Windows only).
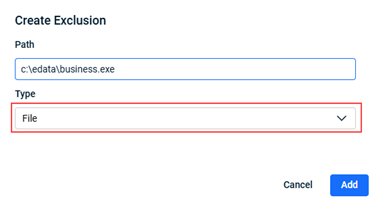
- Click the Add button.
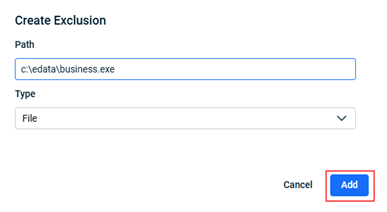
The exclusion is listed in the Universal AV Exclusion table.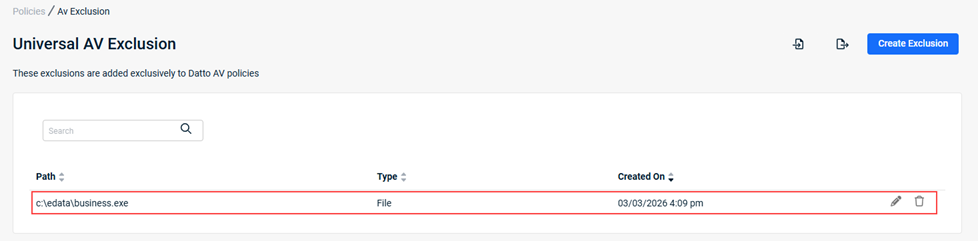
- To add another exclusion, repeat steps 3a-d.
NOTE To edit a Universal AV Exclusion, click its pencil icon. Make the desired edits and click Update.
- Click the Create Exclusion button.
- To upload a list of exclusions using a CSV file:
- Create the CSV file per the requirements specified in the CSV file format section above.
- Click the Import Exclusions icon.
- Follow the prompts.
- To include the Universal AV Exclusion list in a Datto AV policy:
- In the left navigation menu, select Policies.
- For the applicable Datto Antivirus policy, click the ellipses menu.
- Select Edit.
- Expand the Exclusions section and select the Include Universal AV Exclusion checkbox.

- In the upper-right corner of the Edit Policy page, click Save.
Step 4: Submit a File for Analysis
Submitting files to Datto Antivirus helps improve threat detection accuracy. All submitted files are analyzed by Datto security researchers, and the results inform future protection capabilities.
Submit a file for analysis
- On the top navigation menu, click Policies.
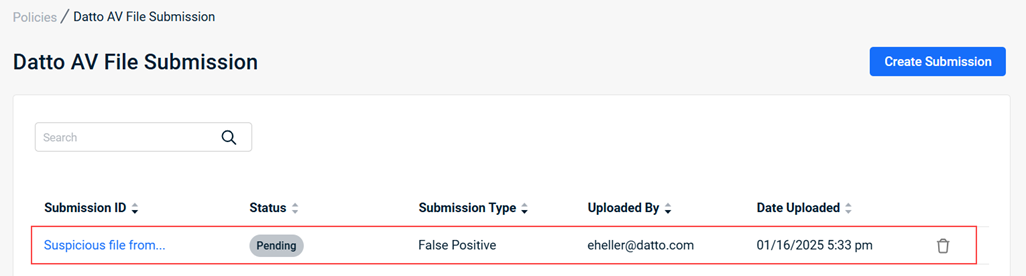
- In the left navigation pane, click Datto AV File Submission.

- Click the Create Submission button.

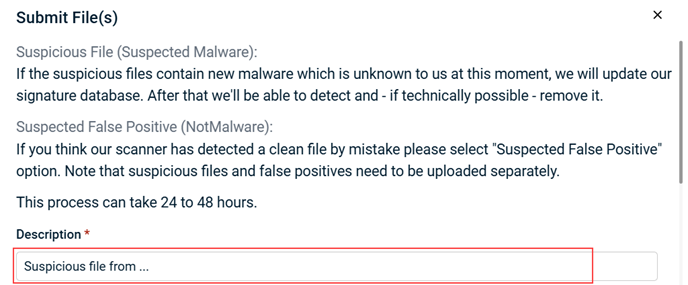
- The Submit File modal is displayed. In the Description field, enter information that will help you easily identify the file. The description you enter will appear in the Submission ID field in the table.
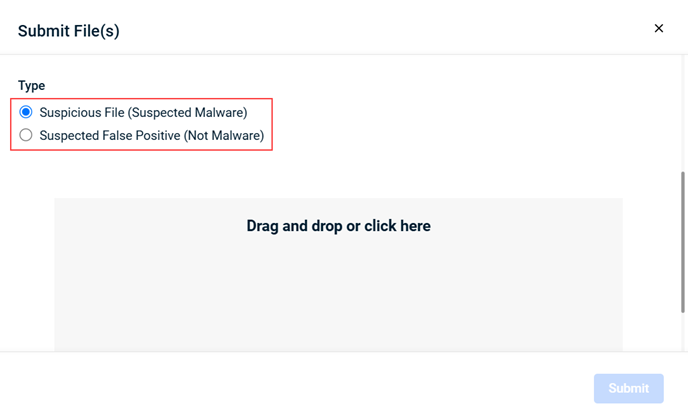
- For Type, select one of the following:
- Suspicious File: Selected by default. This is a file that you believe is a threat and you would like Datto AV to add that file's hash to our malware library. Be sure to zip and password protect the file using the password “infected.”
- Suspected False Positive: A file that you believe should not be flagged by Datto AV. Typically this will be used by application developers to mark a new agent version as not malware or as a file previously detected.
- Drag the applicable file to the Drag and drop field or click in the field to select the file. If necessary, you can delete the file and select a different one.
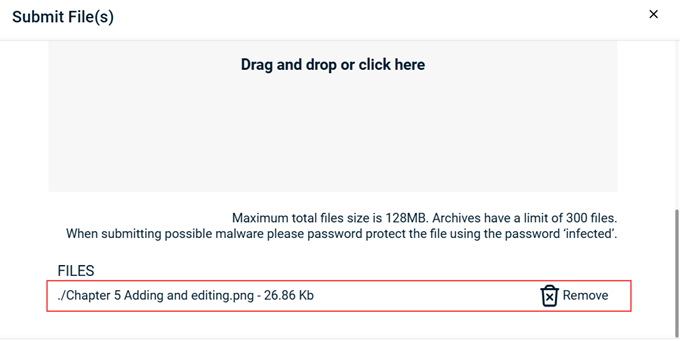
- Click the Submit button. The file is listed in the table Status of Pending. The Datto AV security engineers will evaluate the files to confirm the submission type is valid. The file hash will be returned with the disposition, and the Status will convert to Complete. The submission review process may take 24 hours.
What Happens After Submission
Submitted files are scanned automatically. If the file was previously submitted, a determination may be returned quickly. Otherwise, a Datto security analyst reviews the file and updates its disposition.
Step 5: Provide an Application for Enhanced Testing (Support‑Assisted)
In some cases, submitting a single file may not fully resolve recurring false positives or false negatives. This is common with custom, proprietary, or frequently updated applications.
If false detections continue after file submission, contact Kaseya Support and provide the full application package (such as an installer or related binaries).
Providing the complete application allows Datto security researchers to:
- Test the application in its intended runtime context.
- Identify behavioral patterns that trigger detections.
- Improve detection logic to reduce future false positives and false negatives.
| Revision | Date |
|---|---|
| Initial release. | 3/26/26 |


